Tuesday, December 21, 2010
Saturday, December 11, 2010
Thursday, December 9, 2010
Tuesday, December 7, 2010
Monday, December 6, 2010
Cohesive Body Tension - Part II
You can find the original post here. I really recommend reading that post before trying any of this stuff...
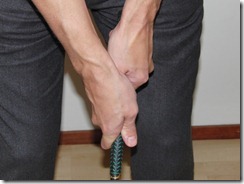
Left: What happens if I take my left hand of the club.
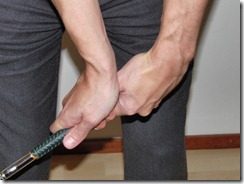
Middle: What happens if I take the right hand of the club.
Right: Both hands on.. duh...
The arrows show direction of force/pressure. The arrows that are at 'finger' height are merely a result of deliberately attempting to move the wristbones outwards while holding on the club. (For the right hand it feels like a hinging action around the two middle fingers.)

Sunday, November 21, 2010
Hogan’s Chipping Technique
Here we see Ben Hogan practicing his chipping. Note the unorthodox technique he uses in this video. When I first saw this I immediately thought that it might be a good way to play short chip shots. I like that there’s very little moving parts, which would help consistency. Also, the fact that the wrists have to do the bulk of the work allows you to go at it a little more aggressively and really trap the ball against the turf.
Technique
On the way back it looks like he uses a combination of bowing and turning of his (left) wrist. Below you can see what I think that he’s doing with his wrists. Note that the forearms may or may not participate, depending on the length of the shot.
Address (left) and end of ‘backswing’ (right).
On the way down simply pull the club through using the pivot while performing the exact opposite of the move you made in the backswing.
There is a document floating around on the internet which supposedly contains transcriptions of letters that Hogan wrote to friends. I seriously doubt that it really is Hogan who wrote those letters. But anyway, since it contains a few paragraphs about this chipping technique I thought I’d share it anyway.
Here it is:
"The Hogan Letters: Written by Ben Hogan 7-20-78
---As to your inquiry about chipping I haven't explained it to you because you've never asked and I thought perhaps you had no problems with them. The best method that I have ever used was explained to me and demonstrated by Bobby Jones many years ago when I was a neophyte golfer. It has proven to be invaluable in salvaging pars from fifty yards into the green, and I have yet to find a better method. With a little practice it will give you accuracy and you can hit it to the pin with assurance that you will have an excellent chance for a one putt and a par.
Snead stole it from me when we were playing together in the Tam O'Shanter in Chicago and the rascal went on to win the tournament. Snead is very observant of other golfers unique or special shots and watched me knock one up to within four feet on the second hole from twenty-yards. The ball floated up hitting about 10-feet and rolled like a putt right at the cup. He didn't say anything but on the sixth hole, a 540 yard par 5, he was about 25 yards from the green and he pitched one up using my technique and almost holed out, but had only a two-foot putt for a birdie. "You see," he said, "us mountain boys learn fast, and are not as dumb as you think." Since then I have revealed it to Trevino and of course Dickinson. It has salvaged a list of pars for them.
The basic idea (and now we get down to brass tacks) is to take a normal square stance (not open or closed) and a good grip (V's of left and right hand pointing midway between chin and right shoulder with the club face square to the line (be sure to not open or close the club face), then take the club back turning the hands clockwise 90-degrees bending the right elbow which folds as the hands move up in a short arc all the while keeping the upper part of the right arm in the same position as it was at address (in other words the upper part of the right arm does not change position in relation to the body). Very little movement of the legs is involved if any (keep knees flexed and limber). Keep your eye on the ball and swing the club head down to the ball. The hands will automatically revert to the position at address and will move the head of the club head (a nice delayed clipping action).
The ball should be struck crisply and a nice divot taken, which will be in line with the flight of the ball. The firmer the ball is hit the higher the arc it will take with less run as it hits. The shorter the hit the more run involved but the ball will settle down and run as a putt. It is simply a matter of practice, but one can be very bold with this technique because it minimized the amount of roll to a far greater extent than chipping with a seven or eight iron. Jan salvaged 5 pars with it and shot ? in the grocery tournament and was eight strokes up on second place. If she keeps it up they will ban her so she has to lose a couple.See you soon sincerely
Ben Hogan”
Sunday, November 14, 2010
Cohesive body tension
I’m working on keeping my upper arms ‘packed’ close to the body. It’s funny how doing the exact opposite (of what you think you should be doing) often produces the best results. In this case it certainly did for me.
Take 1
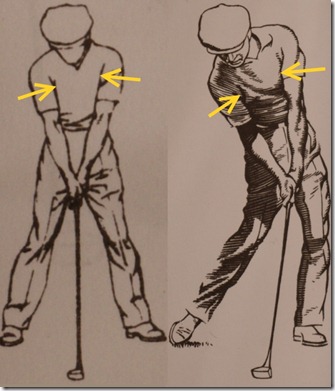
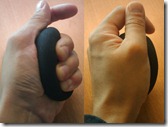
I started out by doing the obvious by pushing my upper arms towards my chest and armpits. (see picture 1)
This felt good but somehow it didn’t feel quite right as I felt it promoted a flipping release of the club for me.
Picture 1
Take 2
Ok. So I needed to find a way to keep the upper arms packed which also promotes the proper hand (release) attitudes.
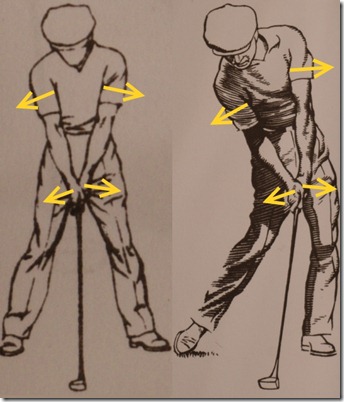
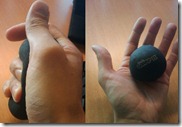
When I tried to pull the arms away from the body (to the sides), I noticed that they didn’t really move away from the body. That’s because they are attached to the shoulder joints at one end and attached to the hands (which hold on to a golf club) on the other... (see picture 2)
I also found that the pulling sensation of the back of the hands puts additional pressure in the fingers and pressure points. This pressure equals feedback and clubhead awareness. These opposing forces stabilize the arm club unit, making it easier to find the slot and repeat the motion.
Picture 2
Elbows and finish
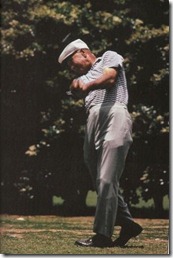
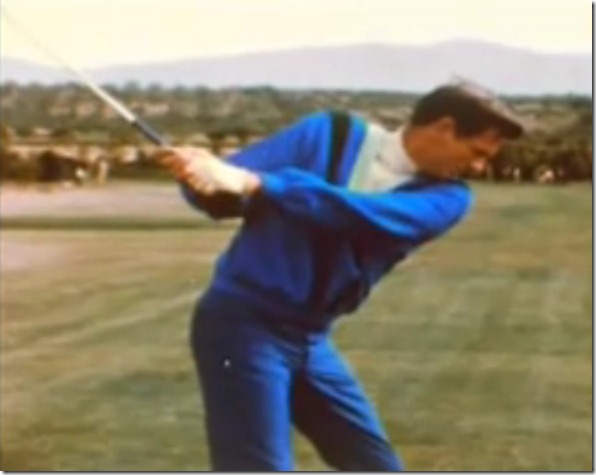
Another thing to consider is that you must make sure that the elbows stay close to the body throughout the swing. Only well after impact, after the club has reached parallel to the ground (See picture 3) you should start to actively pull the arms & club unit upwards, away from the body. (See picture 4) Even though this is a different topic altogether I thought it’d be good to mention it briefly.
Disclaimer
I’m a student, not a teacher; and therefore I reserve the right to change my mind at any time. I am writing this stuff down merely for future reference. If it helps someone else along the way that is great but again, I’m not pretending to have any, let alone all of the answers…
I’m swinging on a very flat plane with clubs that have lie angles that are 8 degrees flatter than ‘standard’. It is easier to keep the arms close to the body when you’re not swinging as upright as many of the modern more upright clubs promote.
P.S. Please visit the Advanced Ball Striking site and Forum for loads of good information and discussion on all things golf.
Saturday, October 23, 2010
Hogan Five Lessons Drawings Swing
Friday, October 15, 2010
Hogan in Stop Motion
Gary Player Swing and Clinic in Poland
Driver swing:
The clinic:
Thursday, October 14, 2010
Wednesday, October 13, 2010
Lee Trevino @ 1990 Senior US Open
First he hits a wedge (DTL view) so you can clearly see his typical out-to-in looping action. After that a perfect, pin high 4 iron shot.
Both these swings were taken from the video below:
Friday, October 8, 2010
Doug Sanders – Swing Sequence
http://en.wikipedia.org/wiki/Doug_Sanders
Great action and very flat swing. All torso and hands, no arms.
The 'top' of the back swing. Shoulders turn more than arms…
Thursday, September 30, 2010
Up in the skies
Life is Good.
Line up:
Swings: Ben Hogan
Guitars & Vocals: Stevie Ray Vaughan
Music & Lyrics: Jimi Hendrix
Well, I stand up next to a mountain
And I chop it down with the edge of my hand
Well, I stand up next to a mountain
And I chop it down with the edge of my hand
Well, I pick up all the pieces and make an island
Might even raise a little sand
'cause I'm a voodoo child
Lord knows I'm a voodoo child baby
I want to say one more last thing
I didn't mean to take up all your sweet time
I'll give it right back to ya one of these days
I said I didn't mean to take up all your sweet time
I'll give it right back one of these days
If I don't meet you no more in this world then uh
I'll meet ya on the next one
And don't be late
Don't be late
'cause I'm a voodoo child voodoo child
Lord knows I'm a voodoo child
Friday, September 24, 2010
Friday, August 20, 2010
Grip Strength Exercises
Forearms and hands
Having strong hands and arms allows you to secure the club with less effort. This in turn keeps the wrists flexible.
Hogan showing us his grip.
When you have developed a good grip you can start focusing on increasing grip strength. For the left hand you want to be training the last three fingers (pinky, ring finger and middle finger) and for the right hand the ring and middle fingers.
Hogan explaining the grip and the pressure points.
Exercises
There are a couple of ways to train these muscles. You can use a grip strengthening device or a small rubber ball, and squeezing the steering wheel whilst driving to work will work too. Squeeze, hold it for 10 seconds and repeat. Don’t forget to switch hands after a while. Success guaranteed…
Thursday, August 19, 2010
Attack vs. Defense
The ball, if the truth be known, plays a brilliant defensive game. Confident in its own emplacement, it does nothing to interfere, but waits for the player to attack.
Consider the matter a moment in a mood of exaggeration. The course is empty and you are without a partner. You and the ball are about to start the intimate personal duel in which only one can survive. You know you must attack and you are wondering about your plan. The ball is perfectly calm and brilliantly on the defensive.
You tee up and grasp the club, perhaps a little quickly, and with a number of plans in your mind. You start the address, that preliminary reconnaissance, the probing of the enemy line. Then you launch the assault, trying to stick to one plan, but halfway up the backswing you decide that the time is not ripe.
You drop the club and light a cigarette, and you give the enemy a threatening look while trying to conceal your fear. You walk away and take in the surrounding view. Everything is very peaceful. Some cows are grazing in the field to the right of the tee. A shot landing in that field will hardly disturb their peace, but you know that it will disturb you because it will cost you a stroke.
Trying to eradicate such thoughts you turn again to the tee, eagerly hoping that perhaps you can see a gap in the defenses. Everything is just as it was. The ball is impregnably calm, awaiting the expected attack. You walk to the start line once more, muttering as you go- "I wonder who it was who said that this is a cold-blooded business."
Only good generals survive. They survive and are successful because experience has taught them the principles and techniques of their art. These principles are the basis of their plan, and when they have decided just how they will attack---or the shot they wish to play---they waste no time in attacking, confident of success because they are obeying those principles which have stood the test of time.
E.M. Prain...1946
Tuesday, August 10, 2010
Putting Notes
The putter
Get yourself a simple blade style putter that let’s you know how well the ball has been struck. During training it’s very important to know what you are doing wrong. Say for instance that you don’t strike the ball with the center of the club. With some of the perimeter weighted putters this is very hard to feel. In my opinion, a good putter will give your hands the necessary feedback and will teach you the feeling and sound of a solid strike. Such a putter will make it easier to ingrain good habits. A simple ‘blade’ style design with less visual clutter allows for more precise aim IMO. I also prefer a putter that has enough weight to let you feel the clubhead during the stroke. With a heavier clubhead it’s also easier to start the backswing with a smooth, steady motion. If you go too heavy, you may find it hard to judge distance.Setup
There lots of different ways of setting up to the ball. In the end it’s about finding a setup that allows you to rock your shoulders up and down square to where you want the ball to start.For me that means that I basically stand square, or maybe slightly open to the target. If I grip the putter I feel that my shoulder line is slightly open (and the putter’s face is closed). From there I just square up my shoulders until the face of the putter is square to the target. I take a few practice strokes to check and groove this ‘dynamic’ alignment and if it’s good I take a small step forward and pull the trigger.
As far as your head is concerned, try to keep your chin against your chest. The more vertical your eyes can look down at the ball the better you will be able to see your line. Also, if you set up this way you can turn your head and trace the line to the hole with your eyes better.
I usually set up with an equal amount of weight on both my two feet but it may help to get some more weight on your front foot.
Grip
I use the a ‘standard’ putting grip with the right hand down. Most of the grip pressure is in my right hand, between thumb and index finger. My left hand, on the other hand, I wrap around the top end of the grip and my right hand very lightly, where it can function as a stabilizer.Ball Position
Just slightly forward of low point is where I prefer the ball to be. It depends on your stance width but this will either be at the center or forward of the center between your feet. It also depends on the loft of the putter but the main purpose is to get the ball rolling as soon as possible after the strike. If you hit the ball after low point (on the upstroke) the ball will get some topspin, which is what gets the ball rolling faster. The ball needs to be struck at the top half to eliminate skidding.Distance From the Ball
I try to get my eyes directly above (or slightly inside) the ball and let that dictate the way I stand to the ball. Besides that, you may need to have the lie of the putter changed so you can stand more comfortably. It’s important that the sole of the club is flush to the ground.Anchor Points
Before (and during the stroke) I make sure that my left hip and my throat remain in a fixed position. I need to feel some stability in my legs/knees too. Practice this until it becomes second nature. This will give you a stable base upon which to swing the putter.Starting the Stroke
I start the stroke by simultaneously dropping my left shoulder and taking the club away with my right hand. Ideally the shoulders and arms should move as one unit, with the shoulders moving in a vertical, up-and-down manner. During the stroke I keep my eyes focused on a small spot of the back of the ball. Sometimes it helps to stare at the ball without focusing on it. What you don’t want to do is follow the clubhead on it’s way back. I know this can be very tempting but it will only make for a wobbly takeaway.. Try to take the club away with a steadily accelerating tempo, gradually adding grip pressure.A Change of Direction
The change of direction in the putting stroke is very important if you want to get any good at distance control. It should be almost effortless in the sense that the intensity and length of the backswing determines the timing and length of the downswing. It should be a natural reaction to the backswing without any interference from the hands and arms. The only thing to monitor is that the left shoulder moves upward during the downstroke.Once you get this you will start to hit more putts with perfect speed and see lots of balls dying in the hole. It can be tricky to kill the hit instinct, even with putting, but the results are worth it. It may seem like you are giving up control of your downswing but in reality you’ll get way more control once you start seeing the true relation between backswing and downswing. The backswing being the action, the downswing being the reaction to that action. The added benefit is that your stroke will become purer because you won’t have to be steering the club on the downswing and contact will be better as well.
If you have trouble getting the hang of this you may find this helpful: Take a backswing, and pause the club at the the point where the change of direction takes place for just one second, and then let it all ‘fall’ towards the target. The momentum is set up by the intensity and length of the backswing and it can be stored by holding the club still before releasing it all on the downswing.
Thursday, August 5, 2010
Restoring Irons – 8: Lie Adjustments
In the last installment of this series on restoring irons I wrote about regripping clubs. When you’re done with that you may want to change the loft and/or lie of your irons.
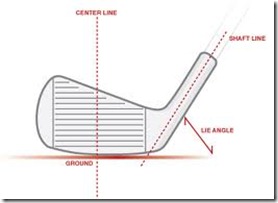
Vintage irons usually have weaker loft compared to modern irons, so you may want to bend those a bit stronger. The lie angle, which is the angle between the shaft and the leading edge of the club head, may need to be changed as well depending on how flat or upright you want to swing the club. Forged irons can be bent more easily than cast irons. With cast irons the risk of breaking the hosel is far bigger and you probably will only be able to bend them 2 or 3 degrees tops.
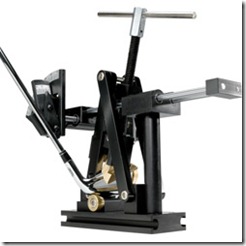
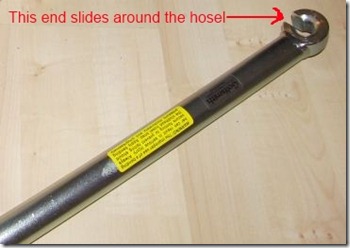
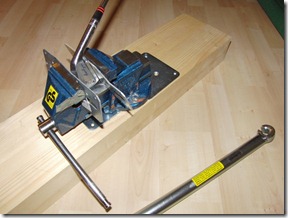
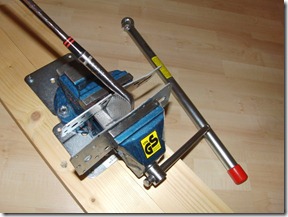
In this post I will describe the process of bending the lie angles of my Hogan irons. I bent these clubs 7 degrees flat and I did it using a bending bar, a vice and protractor. Normally you would use a professional Loft and Lie machine for this purpose but since I don’t own one I decided to be creative. Using a dedicated machine is much easier and faster than securing the head in a vice, but if you are on a budget you can get similar results using my method.
Left to right: A professional loft and lie machine and a bending bar. (Golfsmith)
If you have a workbench with a vice then that’s great. I don’t have a workbench in my apartment so I opted to bolt the vice onto some pieces of wood.
Securing the heads
Securing the head in the vice is the tricky part. As you can see, I used 2 small metal plates to protect the club from damage. You need to find a way to secure it so that it won't move while bending. The best way is to start by clamping the top line and the leading edge in the vice and try to bend the hosel. If the head starts to twist in the vice it means that you didn't secure it in a way that resists the forces of the bending operation.
Bending the hosels
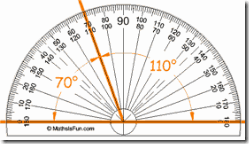
Don’t try to bend the clubs in one go, make multiple smaller bends until you feel that you’ve got it right. After that you probably need to measure and check the new lie angle. You can do this by setting the club with the leading edge flush to the ground and measuring the angle between the shaft and the floor with the protractor.
If you have the head secured It's also important to position the bending bar as low as possible (where the hosel meets the head) and bend it at that position. If you bend to far up the hosel you may run into problems later if you need to remove or replace shafts…
Tuesday, July 27, 2010
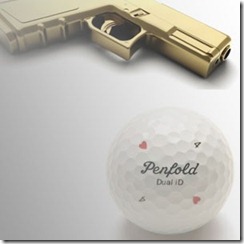
Classic Matches: Auric Goldfinger vs. James Bond
To celebrate the Ian Fleming Centenary in 2008, Penfold Golf brought back the golf ball played by 007 in his match against arch enemy, Auric Goldfinger.
Friday, July 23, 2010
Strange Backswings
Much has been written about the backswing; it’s a topic that instructors love to talk about. You don’t hit the ball on the backswing, and there are many touring pro’s who hit the ball very good with a non-standard backswing. An instructor that teaches static positions will explain this by saying something along the lines of: “This player is so talented that he can make split second adjustments so he will still come through the ball in a proper manner despite his awkward backswing..”.
I disagree with this. Teaching someone the proper positions is no guarantee for proper movements. In my opinion the backswing is merely a move that allows you and your club to find the right ‘slot’, from which you can swing the club through the ball in a dynamic and efficient motion.
Here is an example: Lee Trevino; one of the greatest ball strikers of all time. He uses a figure of 8 model:
Of course there are things you should and shouldn’t do but a basic truth is this: Eliminate any unnecessary movement; remove as many variables as you can and you’ll be left with a simpler, more efficient motion. A simpler move is also easier to repeat and you have less stuff to think about. If looping the club outside on the backswing makes it easier for you to come from the inside on the downswing then it’s a perfectly valid move. You just need to make sure that you can repeat it.
Jim Furyk is a good example of a very successful player with a very strange swing. Notice the 'helicopter move' at the top of the swing.
And here's a compilation of strangely effective swings:
Enjoy!
Wednesday, July 21, 2010
Tuesday, July 20, 2010
Geoff Mangum’s work with Jin Jeong
Amateur player Jin Jeong has finished T14th at this year’s Open Championship at St. Andrews. The strongest part of his game is his putting he says; if you don’t believe him just watch this video:
He ended his last round at St.Andrews by holing a long eagle putt.
His success with the flat stick is a direct result his work with puttingzone founder Geoff Mangum. Mangum has a lot of free content for you to check out. If you like his approach you can buy his ebook together with 2.5 GB of content with instruction in various formats for less than 20 USD. I intend to buy this and will do a review in the future.
Here is an interview with Jin Jeong:
iseekgolf.com: Jin Jeong - Making his Mark from iseekgolf on Vimeo.
Thursday, July 15, 2010
Restoring Irons – 7: Grip Installation
EZ-Grips

Some grips are easier to install than others. For this project I chose Griptec EZgrips because they are cheap and very easy to install. The look and feel is similar to Golf Pride Tour Wraps. To install them all you need to do is open the package and slide the grip on the shaft! In the beginning they will be much too wide for the shaft but within 24 hours the grips will shrink to fit. It beats me how it works exactly, all I know is that it’s some sort of chemical treatment and that it works great. The grips will feel very soft at first but after a few days they will firm up and feel like Tour Wraps. Tip: Remember to line up the text on the butt square to the clubface so they will look the same throughout the set.
Normal grips
To install grips you need to:- Measure the grip length.
- Wind double-sided tape around the shaft and peel off the backing.
- Place the grip in a vice so you can work with your hands free.
- Cover the vent hole with a finger and pour grip solvent (or petrol) in the grip.
- Cover the top, shake and then pour the solvent over the double-sided tape.
- Install the grip as fast as you can (before tape gets sticky again.)
- Straighten the grip and squeeze it a few times.
- Set the club away to dry.
Next up: Adjusting the lie angles. Enjoy!
Wednesday, July 14, 2010
Restoring Irons – 6: Assembly
Assumptions
- You have shafts with abraded tips.
- The ferrules are installed in the correct position.
- The heads are bored out to fit the shafts.
Preparation
First of all you should reserve a space where the clubs can be set upright (e.g. against a wall) to let the epoxy cure. Put some newspapers on the floor in case of epoxy spilling. After that, I suggest you prepare a workbench where you'll have all shafts and heads available, and sorted. You don't want to have to search for a certain shaft while you are applying the epoxy.Make sure that the shafts and the heads are clean and free of dust.As a surface to mix the epoxy on you can use a piece of plastic or alternatively just tape some pieces of duct tape (or masking tape) to the workbench.You also need a small stick with which you will apply the epoxy, and some tissues or cloth to wipe off excess epoxy from the club after installation. I like to put some tape on the hosels so the epoxy can’t ooze out of the pin holes. You can see this in the last picture.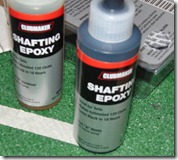
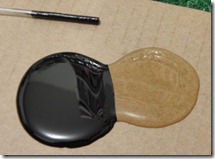
Left: Epoxy hardener and resin. Mid: The 2 parts before mixing. Right: The parts mixed together.
Assembly
First we will be mixing the epoxy. Pour two equal parts onto the surface. Try not to use too much; you'll be surprised how little you need for a single club. Then mix the two parts with the stick until it's one solid color. Let the epoxy sit for a couple of minutes before applying it; this makes for a stronger bond later on.- Starting with the longest club, take the head and use the stick to cover the inside of the hosel with epoxy.
- Take the shaft and cover the abraded portion of the tip with epoxy.
- Gently work the shaft into the hosel using a rotating motion.
- Remove any excess epoxy coming out of the hosel with the cloth/tissues.
- With the head in your hand, tap the butt end of the shaft against the floor to make sure that the shaft is inserted all the way down.
- Finally, in case the shafts are spine marked, rotate the shaft so that the spine is set at three o'clock. (At least make sure that the spine is in the same position for all the clubs.)
- Set the club aside with the head on the floor and the shaft upright so the epoxy can cure.
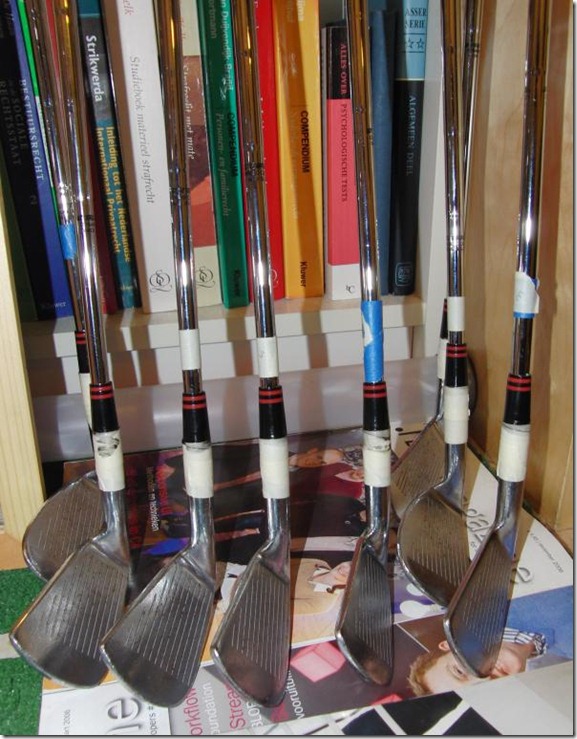
The next installment is about grips.
Tuesday, July 13, 2010
Restoring Irons – 5: Ferrules
Assumptions
I'm assuming you won't be reusing the old ferrules. Most of the times they are damaged and new ones are very cheap. The best thing to do is to replace them with new ones. If you are rebuilding vintage clubs you can buy great looking replica's of various well known models.Ferrules (taken from eBay listing)
Preparation
Before sliding the ferrules up the shafts you must fit them to the width of the hosel. The ferrules are usually made too wide in order to accommodate the varying widths of the different hosels. The ‘professional’ way is to use a ‘buffing’ wheel, but since my French isn’t that good I like to just cut away the part that is too wide with a razor knife. If necessary I’ll grind it straight (by hand).Alternatively you could just skip the cutting and grind it all the way. I'd advise against using a motorized sander for this as the generated heat could melt the ferrule. Just hold down a piece of sanding paper and move the ferrule back and forth by hand .
Installation
Now that you are ready to slide the ferrules up the shafts you should decide on using epoxy or not. From my experience the ferrules will stay in place without epoxy so you should only use it if they slide up the shafts too easily.First start by measuring how far the ferrule should go up the shaft. You can do this by measuring hosel depth and adding this to ferrule length. Put some tape on the shaft at the calculated position so you know exactly how far to push the ferrule. This is important, because if you push it too far up the shaft it's very difficult to push it back down without damaging the ferrule... Then you’ll be left with an ugly gap between hosel and ferrule.
Push the ferrule up the tip of the shaft by hand until this starts to become difficult. Because we are not using epoxy, we need to get creative. Take a marker and color the part of the shaft between the ferrule and the tape. The ink serves as a kind of lubricant which allows the ferrules to slide up the shaft a little easier.
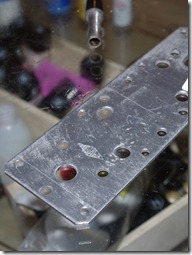
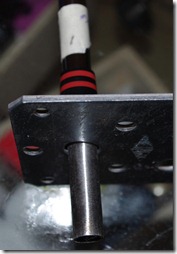
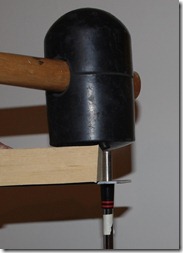
You can use a block of wood with a hole in it or a metal plate (above) to hammer the ferrules in place.
There are a couple of ways to hammer the ferrule the rest of the way; see the pictures for some examples. The proper way to do it is probably to drill a hole in a block of wood and hammer the ferrules down using the block to protect the ferrule from damaging.
If you want to make absolutely sure that there won't be a gap between the head and the ferrule, you should probably not hammer the ferrule all the way. You should instead place the butt end of the shaft on the floor, slide the head over the tip and hammer the ferrule in position using the weight and momentum of the head. This is a good way to ensure a tight fit between hosel and ferrule.
In the next post I’ll show you how to join the head to the shaft.
Monday, July 12, 2010
Restoring Irons – 4: Head preparation
Assumptions
You have sufficiently abraded the shaft tips.Cleaning
You should clean the inside of the hosel with sanding paper. Wrap a piece of paper around a screwdriver or something else that fits easily into the hosel and make both back and forth and rotary movements. You want to do this to get rid of any epoxy residue before trying to fit the shaft. Take a good look inside the hosel to see if there are any irregularities that may prevent the shaft from sliding in. Blow out any remaining dust and gently try to insert the new shaft into the hosel. Depending on how far you can push or screw the shaft in you may want to try to use a bit more force to see if that helps. The fit is meant to be very tight so don't expect it to slide in without any effort! In case you trimmed the tip you probably won't be able to push the shaft all the way down.Note
Should the shaft get stuck in the hosel during fitting then you can get it loose by securing the head in a vice and turn it loose. If you can't get a grip on the shafts with bare hands, try putting on plastic gloves (the ones you used to do the dishes with...) and give it another go.Boring out the hosel
If you feel the shaft is not going to fit, not even by applying a moderate amount of force, you know it's time to bore out the hosel. There are a couple of ways to do this:- Use a reamer. This is probably the safest option but since we are only taking away a small amount of steel it may be overkill.
- Use sanding paper, spiraled around a drill bit. There are specialized drill bits available for this purpose but a normal bit may work as well.
- Use a metal drill bit that is the exact diameter of the wanted size. The danger with this approach is that you can drill out too much if your aim is slightly off. If you go this route you should definitely use a drill press and some sort of vice to hold the head in place.
- It's probably safer to start out with a slightly smaller drill bit to see if you can get there by hand drilling using an up and down motion while turning the head by hand. This worked for me.
In the next installment we'll be discussing ferrules.
From Field Hockey to Golf
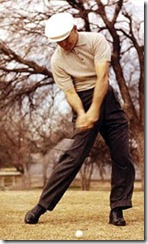
The golf swing is generally thought of as a very unnatural motion but I think that looking at the similarities in different sports can aid our understanding significantly.
Here are a few examples:

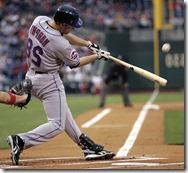

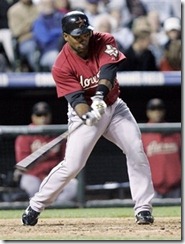
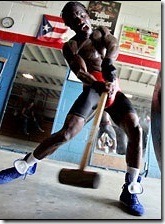
Hockey
I had been playing field hockey as a kid before taking up golf recently. Field hockey is the 10th most popular sport where I live and obviously there are many players that make the transition to golf later on in life.If a former hockey player starts taking lessons from a local teaching pro, the pro will typically shake his head in disbelief when he sees the player hit a ball. You can almost hear him thinking: ‘Oh no, another hockey player! It’s going to take lots of lessons to turn this hitter into a swinger…’ The average pro sees the hit as something bad, probably because they themselves have been taught a pure swinging protocol.
Consider the two pictures below; the golfer being Ben Hogan and the Hockeyer is Theun de Nooijer. They are both considered to be the best players of their generations and as you can see there are lots of similarities in their movements. Hogan is a classic hitter with a very flat, pivot driven swing. Hockeyers typically swing very flat as well.
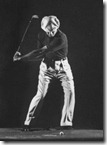
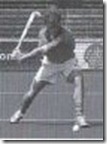
I think it would be far better for the player to embrace his hitting instincts and use them to his advantage. Hogan has clearly shown us that a hit with the hands (not arms) that is properly supported by the body can be a very effective move through the ball.
It's a shame that pro’s don’t recognize this because they could be having much better results with these players.
Restoring Irons – 3: Shaft Preparation
Shaft Trimming
There are several ways to cut shafts but the cheap and easy way is this: Go to your local hardware store and get yourself a pipe cutter. It won’t cost more than 10 bucks and will last a lifetime. This device has a sharp wheel and adjustable jaw grips for use on pipes varying in thickness. You rotate it around the shaft and repeatedly tighten it until it cuts all of the way through. Faster and easier than a hacksaw and it also produces a cleaner cut.WARNING: Overdoing the tightening will damage both the wheel and your shaft (longitudinal cracking may occur!) so take your time, be patient and make plenty of rotations around the shaft.
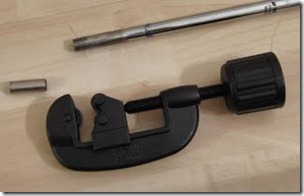
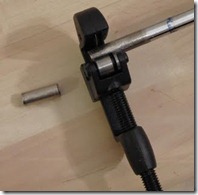
Once the shaft is cut, file away any rough or sharp edges. Especially at the butt end because if you don’t you may end up with damage to your grips (and hands) later on.
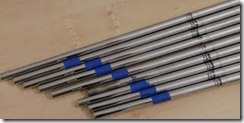
Now that you know how to cut the shaft, you need to decide what side(s) you need to cut from, and how much to take off. Butt trimming on taper tip shafts is done to achieve the proper playing length and tip trimming is done to increase stiffness. (The shorter the tip, the stiffer). (note: Parallel tip shafts all have one raw length and are tip trimmed (for playing length), so more trimming is needed as playing lengths become shorter.)
Should you decide to tip trim your shafts, take note that the hosel will need to be rebored. Usually hosels that are meant to receive taper tip shafts are tailor-made to fit uncut shafts as they are thinner due to the tapering… Another way to achieve stiffer flex is hard stepping. Hard stepping is putting a 3 iron shaft in a 2 iron head. (note: Soft stepping is the opposite).
Abrading
The shiny layer on the chrome finish on the shafts needs to be removed a bit to allow for the epoxy to ‘take’. The fastest way of doing this is by using a belt sander. The alternative is sanding by hand but that takes a lot more time and effort. Measure the depth of the hosel for the shaft you are sanding and mark the the shaft with tape so you know how far up the tip you need to sand. The trick is to slowly and evenly rotate the shaft with your hand as you are sanding. If you don’t do this you might shave off too much on one side which could weaken the shaft. Sand until the shiny layer is gone and you’re left with a rough surface.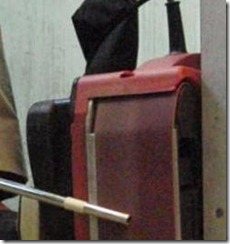
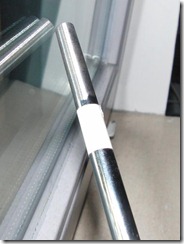
Next up: Preparing the Heads
Friday, July 9, 2010
Restoring Irons – 2: Shaft Removal
For instance, most of the older Hogan heads are secured with both epoxy and shaft pins. You can clearly see these pin-holes in the pics below. If the heads have pins, you must get rid of those before you start breaking the epoxy bond.
Pin Removal
To remove the pins, first have a look at the width of the pins on both sides of the hosel. If they don't look exactly similar in width, you probably have a set with one way pins. This means they can only be punched out from the thinner end. Make sure that you hold the punch securely so as not to scratch the chrome near the pin hole during punching.Some pins can be a real pain to punch out and may have to be drilled out. The other option is to cut off the shafts half an inch above the hosel and take a screwdriver and hammer the screwdriver down the hosel to break the pin. Once the pin is broken in two, it's usually easier to punch the remains out.
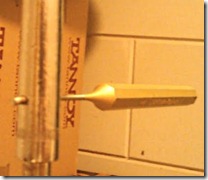
Punching out a (one way) shaft pin.
Shaft Removal
Put the shaft in the clamp and put the shaft clamp in a vice. Now take a blow torch and heat the hosel for a couple of minutes. Put on an oven mitt or a heat resistant glove and twist of the head. If it will not come loose, just go ahead and heat up the head some more. Tip: When you start hearing a hissing sound you know the epoxy bond is breaking. You should now have the head and shaft separated.Put the head in a heat resistant and dust free place so it can cool down.
Put the shaft tip-down against a wall with the tip resting on a piece of newspaper. If there is any epoxy left in the shaft it will have a chance to drip on to the newspaper.
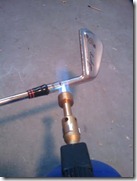
Heating the hosel until the epoxy bond breaks and then the head can be twisted of by hand. (Don’t forget to wear an oven mitt!!)
EDIT: There is a different way of doing this in case heat doesn't help, go here to read all about it.
Next up: Shaft Preparation
Thursday, July 8, 2010
Restoring Irons – 1: Materials and Tools
Introduction
This is part one in a series of post in which I will show you how to (re)build a set of irons to your personal specs:I'll try to describe as best as I can all the steps involved in putting together a set of clubs that are set up just the way you want them.
For about 50% of what you'd normally spend on a new set of 'quality' clubs you can be gaming the set of your dreams! That is including all the tools you'll need along the way.
Old Clubs
First thing to do is to find a set of clubs you will be restoring. If possible, try to find a set that has shafts with the same flex you will be putting in later. This is important because of potential differences in weight (and weight distribution) in the heads. If you don't do this you might just end up with swing weight or trajectory problems when you put in the new shafts.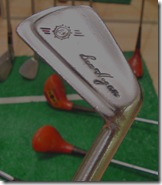
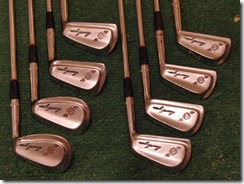
You can find great deals on eBay. With most of the older Hogan sets you simply can't go wrong. The forgings are among the best. Most of the Wilson and MacGregor heads are great as well. I got this set of 1965 Hogan PC5's (2-9 iron) for 25 USD! Shipping and customs costs may add to the expenses but all in all still a great deal for a quality set of blades.
This set is in average condition, showing some wear and minor rust spots. Still very playable and they still have at least a couple of years of play left in them.
Of course, if I really like the heads I can have them rechromed by the ironfactory and still come out cheaper than what you would have paid for a new set of blades.
In case you have bought an incomplete set and wish to complete it ironfinder have very reliable service, fast shipping and lots of choice.
- Important -
Make sure you buy a set that fits .355 taper tip shafts. I think the best shafts are taper tipped shafts, but should you want to put in parallel tip shafts you at least have the option of boring out the hosel to fit the wider tip. NEVER buy a set that has aluminium shafts because these clubs typically have light-weight head to compensate for the light-weight shaft. Also, the hosel size (inside diameter) will be bigger due to the wider tip size of the aluminium shafts.New Shafts
There is so much to say about shafts and shaft technology but that's something for another series of articles.I'll be mentioning steel shafts only since these are widely regarded as being the shafts that provide the most precise feedback and consistency in irons.
Of course there's shaft flex to consider and shaft type is probably just as important.
In general there are two kinds of shafts: .370 parallel tip shafts and .355 taper tip shafts. The smaller tapered tips are stiffer in the tips and less susceptible to torque or play due to the smaller diameter. This is turn improves shot dispersion and birdie frequency. :)
Something else to take into consideration is shaft weight. For the TrueTemper Dynamic Gold Iron shafts nowadays you can choose between four weight classes (100, 200, 300, 400) e.g. DGIS300 means 'Dynamic Gold Iron Stiff-flex 300', in which 300 is heavier than 200.
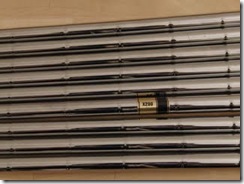 | 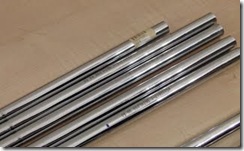 DGIX 2-iron shaft above and below that the 3-4-5-6-iron DGIXL shafts which have longer butt ends. |
Grips
When it comes to grips you have a few options:- Rubber/Synthetic grips (Slip-on)
Most grips these days fall into this category.
- Rubber/Synthetic/Compound grips with Cord inlaid (Slip-on)
These grips usually have a firmer feel to them. Some players like the direct connection to the club.
- Leather grips (Wrap-on)
Leather grips are rare these days and usually quite expensive. John Daly and Retief Goosen are examples of modern day players that use leather. Leather feels very nice and soft but gets very tacky in the rain, providing grip whereas some other grips have a tendency to get slippery when wet.
Tools


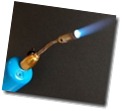


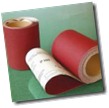

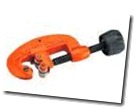
The next part will be about shaft removal.

